The driveshaft is the link that transmits all of the engine’s power to the differential and this part has a lot of work to do. Pay close attention to the speed it spins on your next ATV ride. It is easy to imagine that a slight imperfection of the drive shaft may cause any kind of noise and vibration. You’ll notice it if it does. In cases of extreme neglect, the driveshaft could come loose or break in half and whip everything around it. That can include your feet, so this is something you should pay attention to for sure.
There are several configurations of driveshaft universal joints and this is the part you need to pay the most attention to.

The most common is cross-type joint. Sometimes it is fitted with grease zerks. Checking the joint and its spider is done simply by rotating the driveshaft by hand. If the spider has axial or radial play, its replacement is imminent. Tolerances are as low as 0.05 mm (0.002 inches). Refurbishing is simple and low-cost repair. However, it requires regular lubrication and water is an enemy. Its replacement interval is the shortest in the industry, mainly for spiders. Pay attention to it!

The driveshaft with constant velocity joints is practically maintenance-free since the joint is bathed in grease. Sometimes it has a slider that just needs to be greased in regular maintenance. Pay special attention to the bellows that hold the grease in the joint. The presence of grease in its vicinity indicates that it leaks. Do not delay the repair. If you do, water and sand will get inside the bellows and will damage the joint. Replacement is very simple, however, its replacement purchase cost is less pleasing.

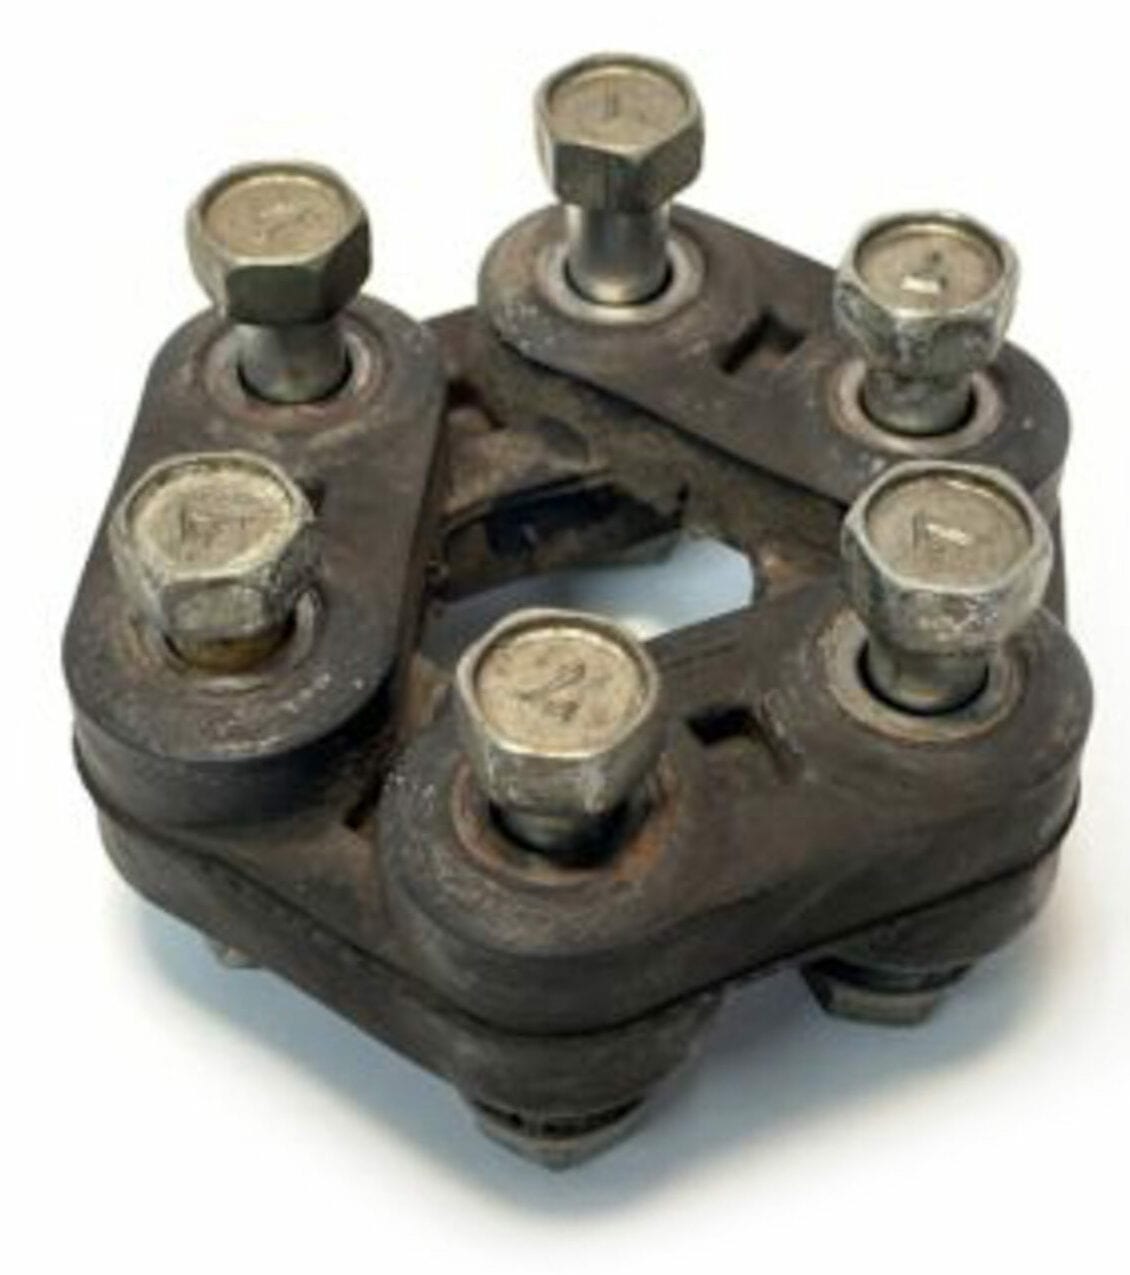
The drive shaft with absorber blocks will often contain a slider to be greased during maintenance compared to other transmission shafts. The function of the joint is made by hard rubber blocks. This configuration requires that the driveshaft be perpendicular to the transmission as well as to the differential. It requires very little maintenance and does not fear water. As long as the rubber blocks do not deform, no action is required.

The drive shaft with a spline seal is almost impossible to break. Round grooves mounted in the grease occupy the location of the seal which is protected by a bellow, but often not very tight. Over time, the grease is washed away and corrosion takes over. Gradually, the grooves wear out and become too loose. The replacement cost is rather hard for the piggy bank. But if we remove the bellow it in order to replace the grease, that will ensure long life to the grooves.
In this case, I’m going to replace a drive shaft cross joint. In most ATVs, the first end of the driveshaft to be removed is the one closest to the differential. It is very likely that the removal of some body panels is necessary in order to access the mechanical parts.

Remove the spring pin from the differential flange.

Pull the flange out of the splines on the front differential shaft by retracting it into the slide of the drive shaft. Small hammer blows may be necessary.

Do the same to extract the driveshaft from the transmission side. Be careful not to hit the driveshaft too much to the side. Internal components of the transmission could be damaged.


Mark alignment marks on the driveshaft and yoke of the joint. Remove the locking rings from the 4 ends of the cross spider. Press one side of the yoke on a vice and hammer the side of the other yoke to hammer out the spider cap. Pliers may be required to complete the extraction of the cap. Repeat the operation for the other 3 parts of the crosspiece. Be very careful to hit the hammer very close to the yoke cross holes. A hammer blow too close to the driveshaft could warp it, causing vibration.

The result of the water that enters the interior of the spider is corrosion.

Clean the holes in the yoke with sandpaper. Check that the replacement spider is the correct size. The choice of spider was a product from EPI brand distributed by Kimpex.

Remove the caps from the new spider. Introduce the spider inside the smaller yoke. Be careful, if the spider has a grease zerk, make sure to orient it properly. Then start to push the spider cap in the yoke using the vice. Take care that the bearings inside the spider cap do not overturn. Push the spider cap past its position using a socket. This little trick will prevent the bearings inside the spider cap from rolling over. Install the first elastic ring. Insert the opposite cap in the same way. Push it until the installation of the elastic ring is possible. Do the same with the rest of the spider assembly. If it is not possible to install an elastic ring once 2 brace caps are installed, it is quite possible that a bearing inside a cap has turned over and blocked the insertion. So you will have to start all over again.

Now, all that’s left is to reinstall the drive shaft on the ATV. Apply grease to the splines on the shaft. This prevents the shaft from wearing out prematurely.
Many symptoms will lead you to the u-joint. Even if you don’t use your ATV’s 4×4 a lot, the front driveshaft still turns. The decoupling of the front axle is rather at the differential level. Do not neglect the front driveshaft. This operation is simple and inexpensive, it must be repeated on average every 8,000 km, especially if the ATV plays regularly into water.


